
Let’s not waste food
Consider composting and preserving

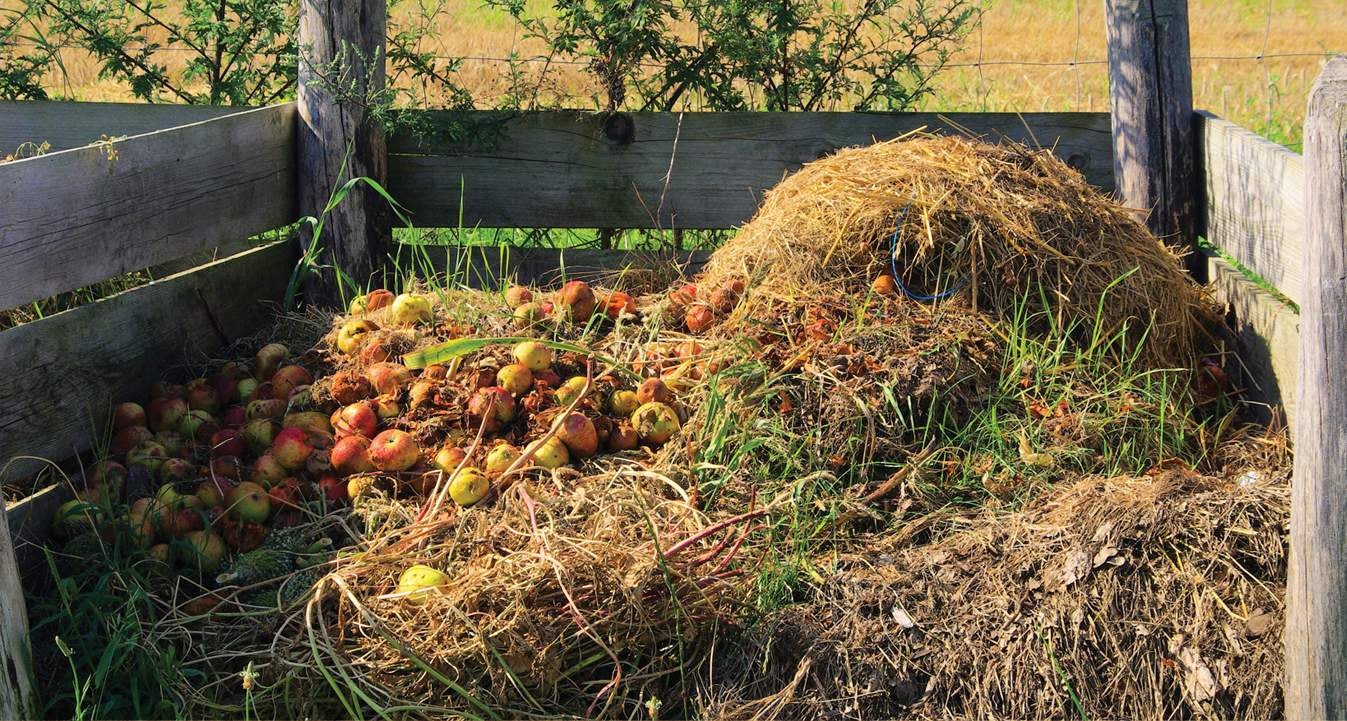
Compost example photo, with focal point!
 “Mom, you won’t want to look inside,” my daughter cautioned. “I have a science experiment in process.”
I did not look inside her kitchen composter. I was a little afraid of what I’d see. The natural microorganisms were breaking down her fruit and vegetable scraps. She described a variety of fuzzy, colorful substances.
I had purchased the composter for $2 at a garage sale, still in its unopened box. I thought my daughter might like the turquoise color as well as the function. Besides, she could plant some succulents in the vessel if she didn’t want to use it for its original purpose. My science-minded, long-term 4-H participant daughter was enjoying this experiment.
WHY COMPOST?
Composting is a way to keep plant materials out of landfills. Unfortunately, yard waste and food scraps make up more than one-fourth of landfills. Composted yard waste and appropriate food scraps can yield organic material for your soil, whether you grow an in-ground garden or use planters.
Compost can help improve soil quality and serve as nourishment for plants. You may be able to eliminate or reduce the need for chemical fertilizers. Compost also helps the soil retain water better, which can be helpful when rainfall is slim.
Plans for composters are readily available, and plastic storage bins work, too. A kitchen composter or a 3x3-foot outdoor bin might be a good way to start composting. To retain the warmth, avoid trying to turn the compost pile under the snowpile in the winter. Worm composting bins using “red wigglers” are another option, but these bins need to be kept indoors in cold months.
WHAT CAN YOU COMPOST?
You need a combination of “greens” and “browns” plus water for effective composting. Greens include vegetable and fruit scraps, such as potato peelings, eggshells, corn cobs, leafy greens and apple cores. Browns include leaves, shredded paper, sawdust, cardboard tubes and small sticks and twigs. Aim for a 50-50 mix of greens and browns and smaller pieces. Be sure to provide adequate water so the microorganisms have moisture.
Do not add meat scraps, fish bones, dairy products, fats, pet waste, weeds with seed heads attached or yard waste treated with pesticides, which might attract rodents and other pests to dine in your bin. For more information, see www.epa.gov(link is external) and search for “composting.”
FOOD PRODUCT DATES
Sometimes, food goes “bad” before we have a chance to use the food. Sometimes, food is thrown away when the food is still safe. Food product dating is sometimes confusing.
Consumers sometimes interpret food package dates as the “toss out at home” dates. Food dates are included on most foods, but, except for infant formula, food dates are not required by federal regulations. In fact, confusion about food product dates probably is responsible for foods being tossed while they are still safe to eat.
The “best if used by” date is a quality date. As long as the food is stored properly, it is safe to use for several days or longer beyond the date. If you notice the food has an unusual aroma, color or texture, use your commonsense and toss it. Consider downloading the “FoodKeeper App,” which provides information about storage life for unopened and opened foods.
AVOIDING FOOD WASTE
The average person wastes at least 1.1 pounds of food daily. For a family of four, that adds up to 1,606 pounds of food ending up in the landfill every year. We all can take some steps to avoid throwing away food, and filling our landfills.
Eating more fruits and vegetables is a good nutrition practice, but tossing food that is past its prime costs money. Be sure to buy what you will use in a reasonable time. Fresh fruits and vegetables are perishable, so consume fresh vegetables and fruits first. If you purchased too much, freeze remaining fruits and vegetables. See www.ag.ndsu.edu/food(link is external) for food preservation information to freeze, can or dry food. You also can repurpose your leftovers. For example, if you have leftover baked potatoes, shred them for hashbrowns. Extra fruit can be added to muffins or used in smoothies. Extra vegetables go well in soups, stir-fry and stew.
Let’s not waste food.
Julie Garden-Robinson, Ph.D., R.D., L.R.D., is a food and nutrition specialist for NDSU Extension.
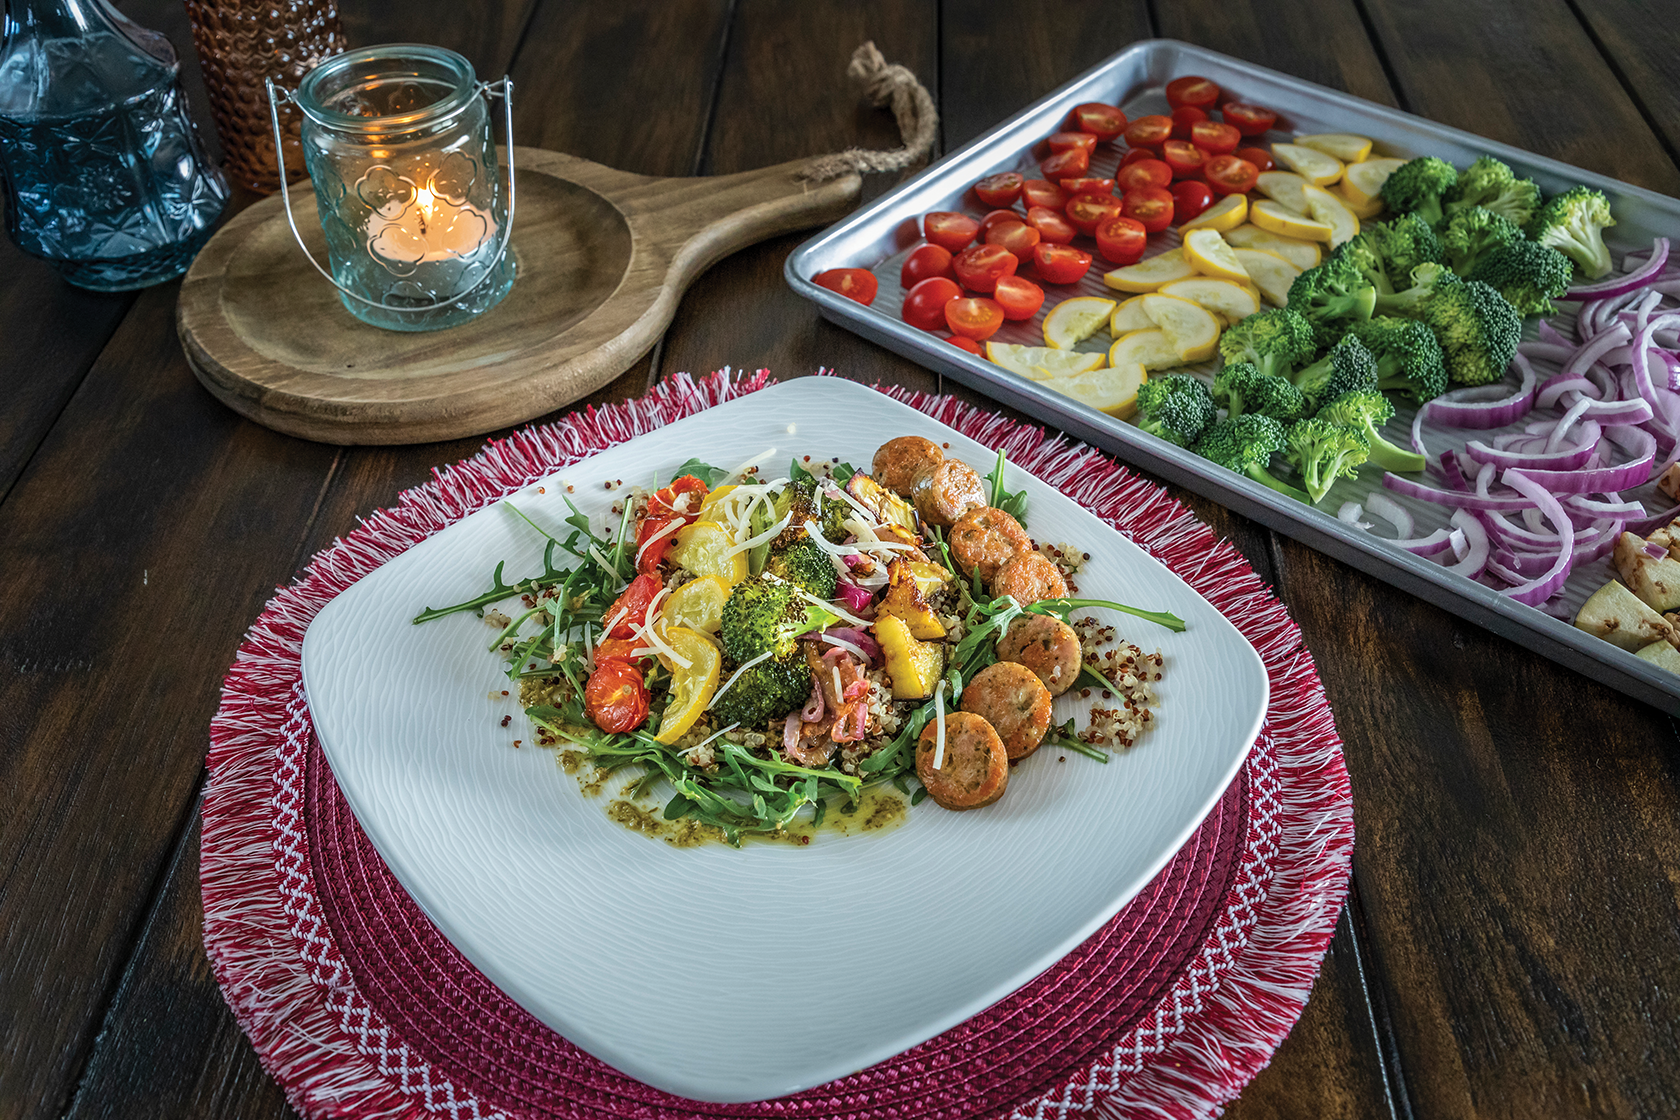
Arugula
½ cup quinoa, cooked to package directions
½ cup roasted veggies of choice
(try tomatoes, yellow squash, broccoli, red onion and eggplant)
Chicken sausage link, sliced and cooked
3 T. prepared pesto
¼ cup olive oil
½ lemon, juiced
Salt and pepper, to taste
Parmesan cheese, for topping
To prepare pesto vinaigrette, whisk pesto, olive oil and lemon juice until combined. Season lightly with salt and pepper, to taste. In dinner bowl, layer arugula, cooked quinoa, roasted veggies and cooked chicken sausage. Drizzle with pesto vinaigrette and top with parmesan cheese.
TO ROAST VEGETABLES: Preheat oven to 400 degrees. Chop vegetables and place on rimmed baking sheet. Drizzle with olive oil and season with salt. Roast until lightly browned and to desired tenderness, about 10-15 minutes, depending on the size and type of vegetable. Remove from oven and squeeze fresh lemon juice over veggies.
For more meal-in-a-bowl recipe ideas, search for the NDSU Extension publication, “5 Steps to Making Your Own Meal in a Bowl,” online at http://www.ag.ndsu.edu/publications/food-nutrition(link is external).
RECIPE by North Dakota Living test kitchen, inspired by NDSU Extension publication, “5 Steps to Making Your Own Meal in a Bowl”
1 cup quick-cooking oats
1 cup buttermilk
1 egg, beaten
½ cup brown sugar
¼ cup canola oil
1 cup all-purpose flour
1 tsp. baking powder
½ tsp. baking soda
½ tsp. salt
1 tsp. cinnamon
½ cup apple, diced, not peeled
Optional cinnamon-sugar topping
Preheat oven to 400 degrees. Mix oats and buttermilk in a large bowl and allow to stand for 15 minutes. Add beaten egg, brown sugar and oil to oat mixture. In a separate bowl, mix flour, baking powder, soda, salt and cinnamon. Add dry ingredients to the wet ingredients and mix just until combined (overmixing may result in lower-quality muffins with peaked tops and tunnels). Gently stir in apple. Fill muffin liners or greased muffin cups about two-third full of batter. Sprinkle with cinnamon-sugar topping (1 T. sugar and ¼ tsp. cinnamon). Bake regular muffins for 15 to 18 minutes, or 20 to 23 minutes for jumbo muffins, until lightly browned and a toothpick comes out clean.
NOTES: If you don’t have quick-cooking oats, pulse rolled oats in a food processor, about five or six times, until oats are chopped smaller and reach the consistency of quick-cooking oats. Buttermilk can be made simply by combining 1 cup milk with 1 T. white vinegar and letting it stand for five minutes.
RECIPE by Julie Garden-Robinson, NDSU Extension


